People who opt-in to your chatbot by interacting with it are considered bot users. These become contacts inside of your chatbot channel and during the course of a single or multiple conversations, the chatbot will be able to gather information about them to give you more insights into your audience.
You can go to your bot users by going to the corresponding section in the left-hand menu once you have logged into one of your chatbots.
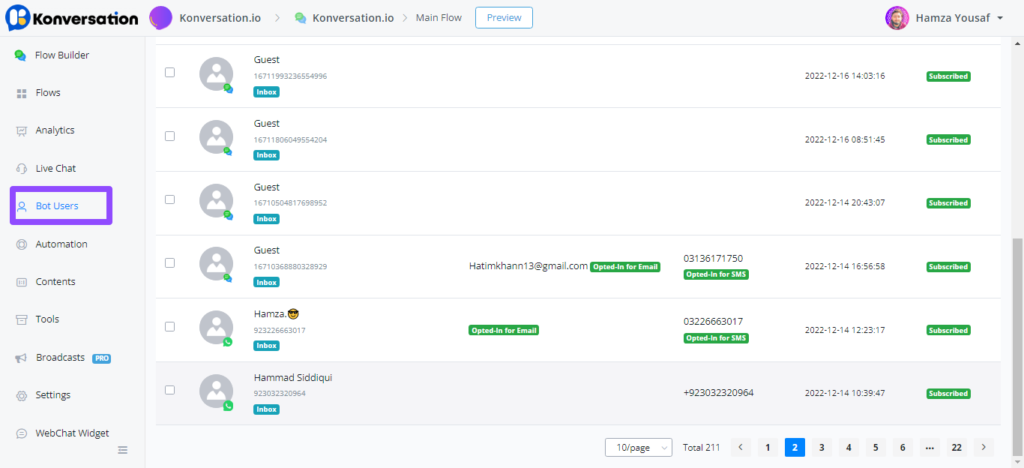
From here you will see a list with a complete overview of all users that have interacted with and therefore opted into your chatbot.
Filter bot users based on conditions

Once on this overview, you can also quickly segment your users by using the filter option. Once pressed you will be able to use any condition/filter you like.

This gives you the ability to quickly see what tags someone has, or what values a custom user fields are.
An example of a filter could be that you want to know who amongst the bot users has given its email.
Another example could be when a user finishes the initial onboarding flow you tag them as such and you want to be able to see who did this.
User information
Once pressing a certain bot user a popup will appear and it will show all the collected bot user details so far.
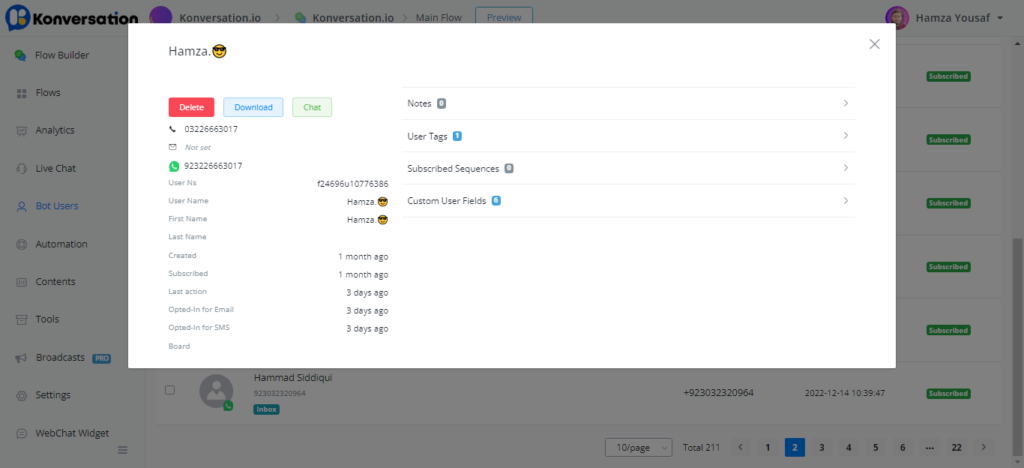
You will see the following on the left side:
- Name
- Gender
- Language
- Timezone
- Local time
Below the profile image, you will have the ability to either delete the user or download the user data. This will help you become GDPR compliant as users might request this from you.
You will also see the specific channel user id and some date and time information like subscribed, last interaction and such.
If we go with the right side of the user information you will see tabs for:
- Notes
- User tags
- Subscribed Sequences
- OTN Topics
- Custom User fields
Only you press one of the tabs you will be able to view the data collected.
For tags, you will have the most options at your disposal.
You will be able to add tags directly to the user but also remove them as well.
For the topics Subscribed Sequences, OTN Topics you will be able to only remove them from the user.
For Custom User Fields you can either remove or change its value.
Importing or creating new users

For the SMS and voice channels, it is also possible to import or create users manually. In the top right, you will have the buttons to do so.
Creating a new user
Adding a single user manually, add the users details then press create.

Importing via CSV file
Import many users in one go by using the import by csv button

Import from Manychat

Great, you’ve made the switch from Manychat. Import all your contacts in one swoop! Including custom fields and tags.


Great, your Manychat users are now moved across!
If you don’t see them straight away, re-fresh your Konversation Connect dashboard
To ensure that everything is connected when using Facebook and Instagram chatbots you will need to change the primary receiver in your Facebook settings.
Switching Primary Receiver
First head over to your Facebook page and select settings at the bottom left hand side 👇
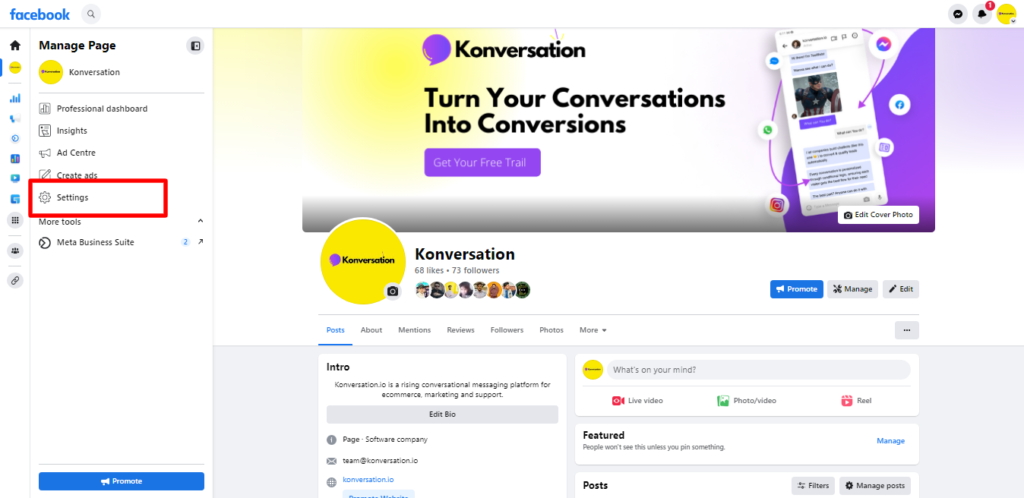
Next, head over to advanced messaging and ensure you can see our chatbotApp connection. And remove the Manychat connection. And that’s it! You’re ready to start chatting with your customers again 🚀
